If you want to save your iPad’s Battery life, the Low Power Mode on iPad OS is the perfect option to go for. It will help you conserve power on your iPad or iPhone especially if you are away from a power source.
The mode is good for saving power. However, to achieve this, many useful iPad functionalities and features are limited.
For example, background tasks refresh and email refresh will be turned off until you switch the setting off.
If you want to use the full power mode or to turn it off to get your device full functionality, here is how to turn it off.
Turning Off Low Power Mode using the Battery Settings
When your iPad or iPhone charges above 80% charge, the mode is automatically turned off and your device regains full functionality.
To turn it off even with less than 80% charge, Go to Settings then the Battery option, and navigate to the top. You will notice it is toggled on. Switch to OFF.
Alternatively, you can opt to set or turn it on when your iPad notifies you of low battery. This will prompt you to turn on twice when your battery comes down to around 20% and 10% charge. This will help you maximise the remaining 20% charge to the maximum.
ETurn On from the Control Center
Apart from the automatic prompt, you can also enable it from the control center setting. One of the quickest ways to enable it on your iPad is through the Control Center. Follow these simple steps.
Step 1 – Access the Control Center- On the top-right corner of the iPad screen, swipe downwards to open the Control Center on your iPad.
Step 2 In the Control Center, you’ll find the battery icon and the Low Power Mode toggle. A battery icon in yellow color represents it.
Step 3Tap on the Low Power Mode toggle to enable it. The toggle will turn green, indicating that it is now active.
How to Turn on from Settings
You can also enable it through the iPad’s Settings app.
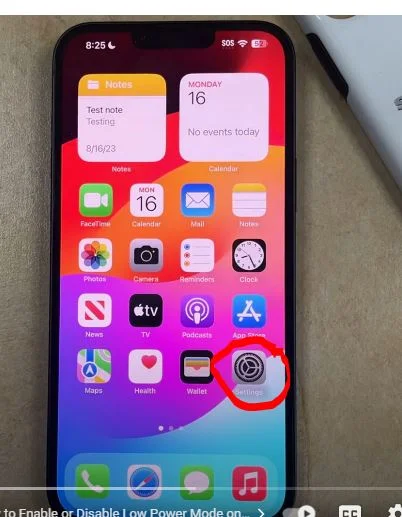
Step 1 – Go to the Settings App – Tap on the Settings app on your iPad’s home screen to open it.

Step 2 – Navigate to Battery Settings – Scroll down and tap on Battery in the Settings menu.
Step 3In the Battery settings, you’ll find the Low Power Mode toggle. Toggle and enable the the option. The toggle will turn green, indicating that it is now active.
Here is a video Guide.
Can Low Power Mode Harm for Your iPad?

This mode will limit access and usage to some background features and applications on your iPad. This is aimed at saving and maximising available iPad charge.
However, turning it on will have no negative impact on your iPad apart from these functionality issues. Once you charge or turn it off, your iPad will be back to normal usage.
Conclusion
Enabling this Mode on your Apple iPad Pro is a simple and effective way to extend your device’s battery life when needed.
Whether you’re on the go or want to make the most of your battery in a low-power situation, this mode provides the necessary optimizations.
By following the steps provided in this guide, you can quickly turn on Low Power Mode and enjoy a longer-lasting iPad experience without compromising on essential functions. Keep your iPad charged and ready for any situation!
FAQ
Will Low Power Mode affect the performance of my iPad?
While Low Power Mode conserves battery life, it may impact the performance of your iPad slightly. Some functions and animations may be temporarily disabled or run at reduced capacity.
Can I use my iPad as usual in Low Power Mode?
Yes, you can use your iPad as usual in Low Power Mode. However, some non-essential features and visual effects may be limited to save battery power.
How long does the battery last in Low Power Mode?
The battery life extension you gain from Low Power Mode will depend on your usage and the overall battery health. Low Power Mode is most effective when the battery level is already low.
Will Low Power Mode automatically turn off when charging?
No, Low Power Mode will not automatically turn off when charging. You’ll need to disable it manually from the Control Center or Settings.